Eclipse: Generating Javadocs
This tutorial shows you to generate Javodocs in Eclipse for your Java classes. It assumes you've already commented your code according to Java documentation guidelines.
-
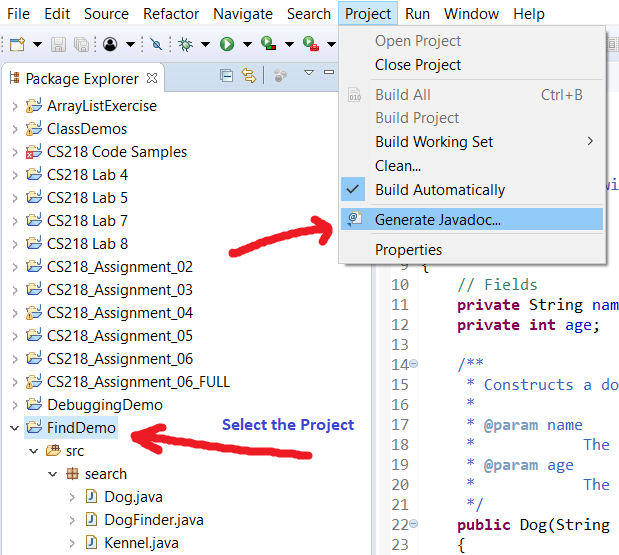
In the Package Explorer, select the project folder for which you want to create Javadocs.
× Attention: This is an important first step! If you've selected a specific package or class, the javadoc tool will create javadocs only for that package or class. You may end up with incomplete documentation! -
Go to the Project menu > Generate Javadoc...
-
Be sure the Javadoc command box contains the path to your Java JDK's
javadoc.exeJavadoc tool (if not, click or tap the box below for help).-
On the Javadoc Generation window, hit the Configure... button:

-
Navigate to the
bindirectory inside your Java JDK folder (typicallyC:\Program Files\Zulu\zulu-x\binon Windows). -
Select
javadoc.exe, then hit the Open button.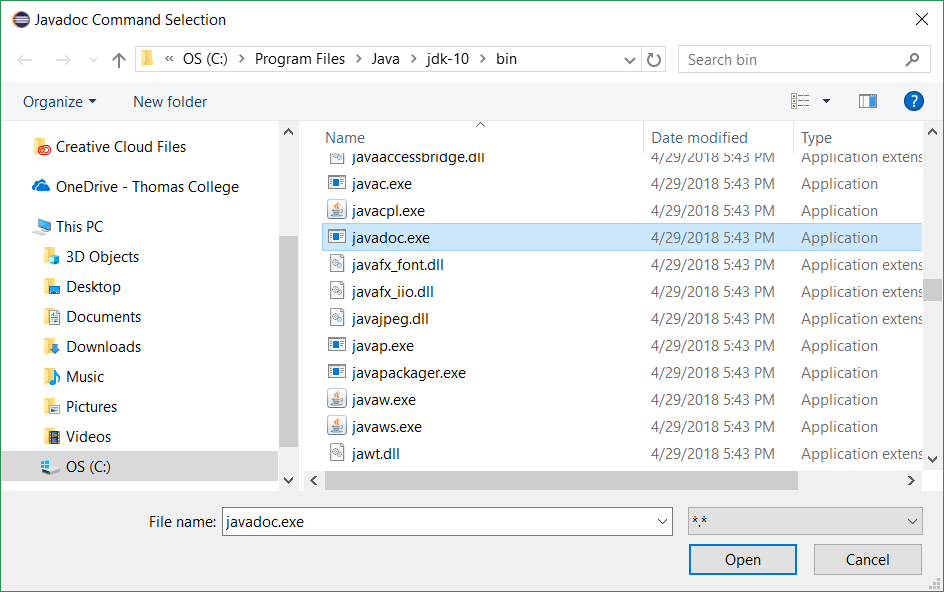
-
-
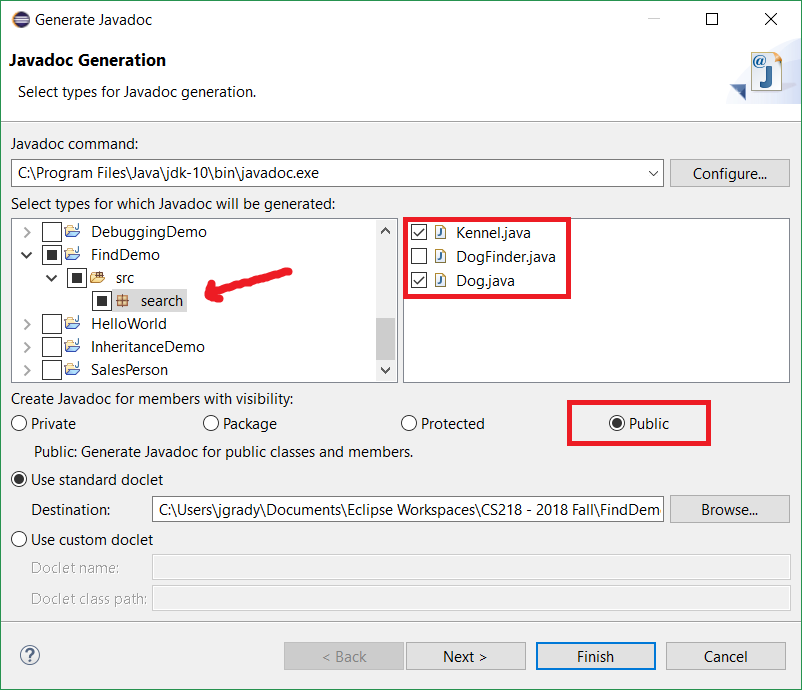
In the project checklist, expand your project, select a package, and check ON or OFF the classes for which you want to generate Javadocs:
-
Check ON the Public button to create documentation for all
publicmembers (see above). -
Leave the standard doclet option CHECKED, then hit the Finish button.
-
Eclipse generates Javadocs for your selected project(s), adding a
docsfolder to your project hierarchy.-
To view the main page of your Javadocs, expand the
docsfolder and double-click theindex.htmlfile: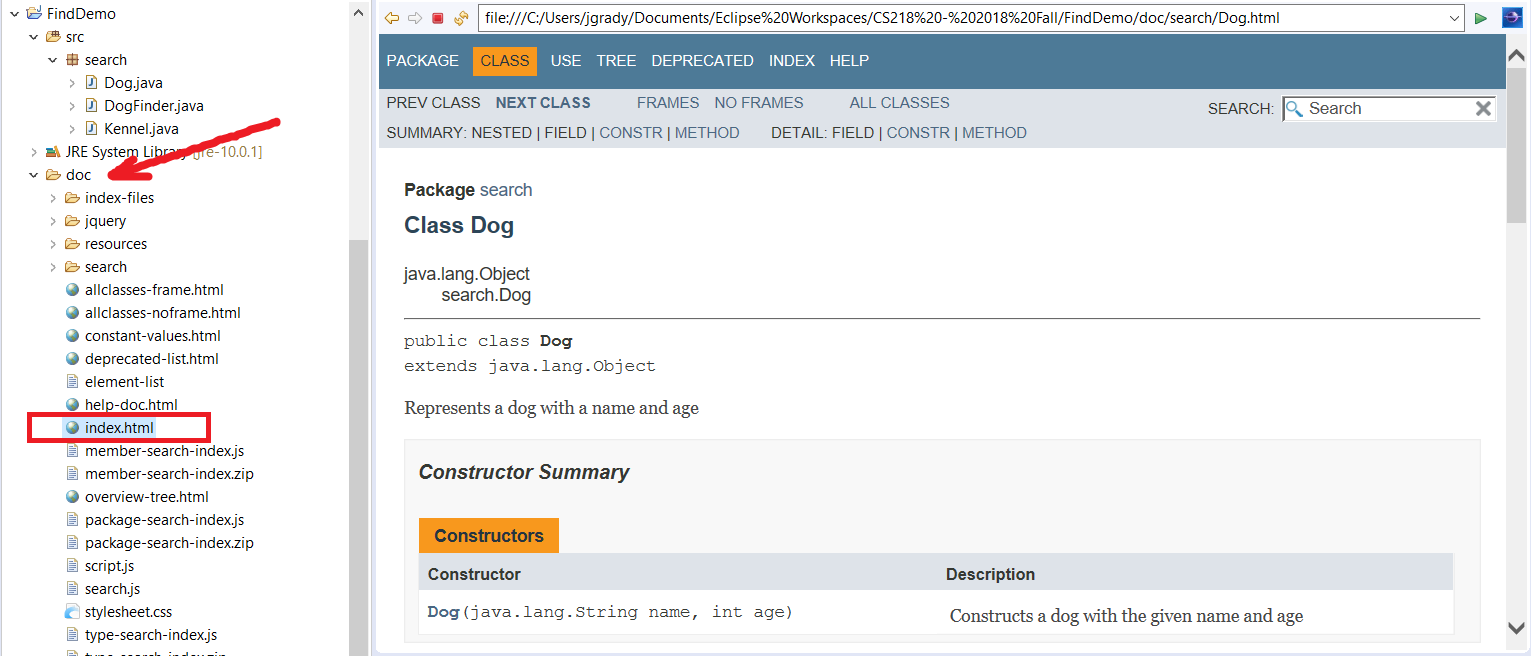
-
Take a look at the Console window and the Javadoc tool's log output. If your Javadoc comments have any syntax errors, the Javadoc tool reports it as warning:
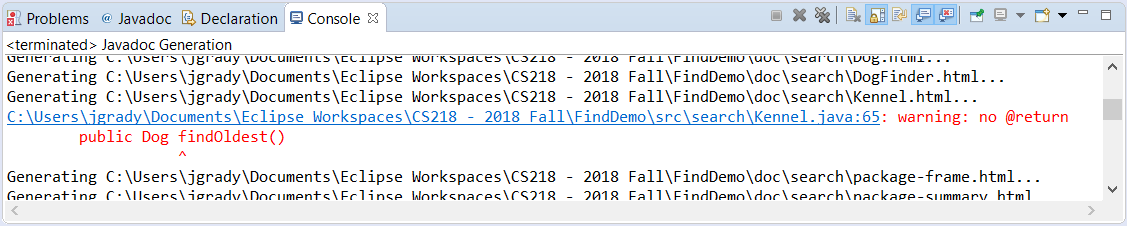
-
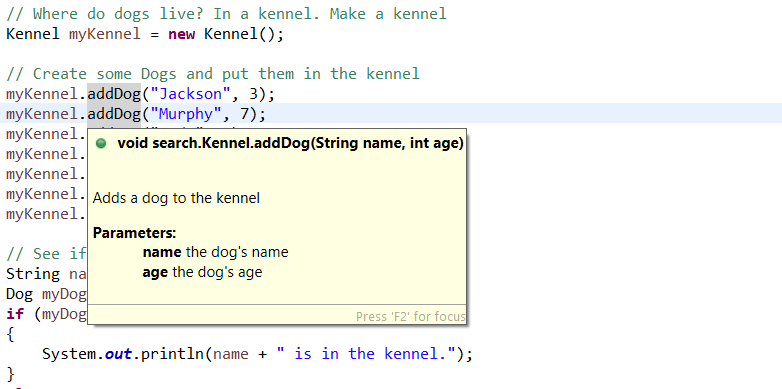
Open or write code that uses one or more of the classes for which you just created Javadocs. Move your mouse cursor and hover over a class name or method. Eclipse now displays a pop-up window with that item's Javadoc entry: