Eclipse: Downloading & Enabling Javadocs
This tutorial shows you how to download the official Java 10 Standard Edition (SE) documentation (or "Javadocs"), then make it available directly in Eclipse.
- Go to the Java SE Downloads page.
-
Scroll to the Additional Resources section. Hit the Download button for the Java SE 10 Documentation:

-
Check the Accept License Agreement button (the website won't let you download the Javadocs until you so), then hit the download link:

-
Save the Javadocs zip file in a folder of your choice. Take note of where you save the Javadocs - you'll need to know that when you connect them to Eclipse.
-
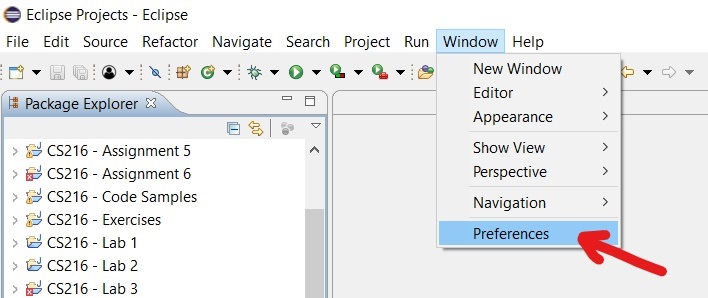
Launch Eclipse. Go to the Window menu > Preferences:
-
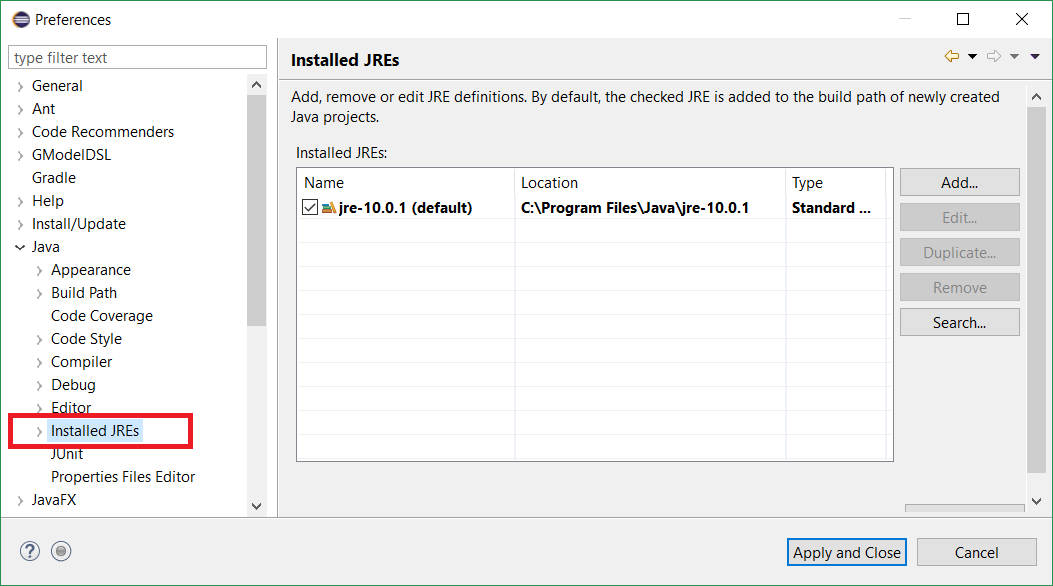
In the Preferences window, expand the Java option and select Installed JREs:
-
On the Installed JREs panel, select the Java 10 JRE then hit the Edit... button:

-
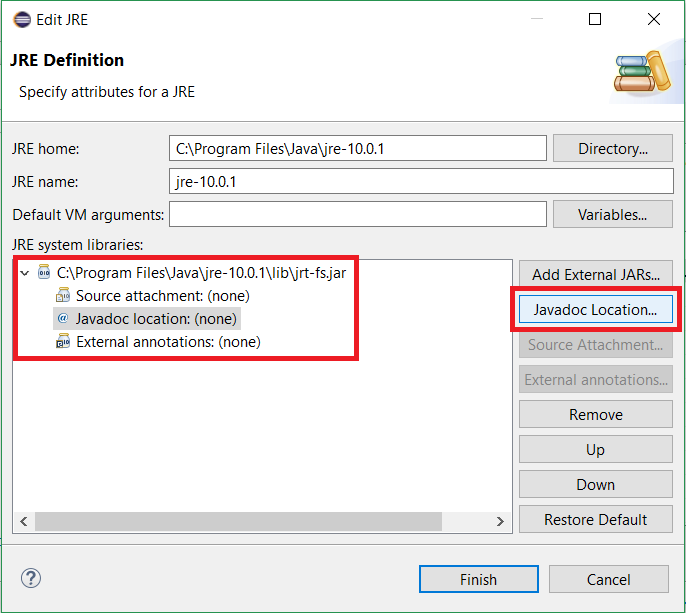
The JRE Definition window appears:
-
In the JRE System Libraries list box, expand the jrt-fs.jar item.
-
Select the Javadoc location (none): item, then hit the Javadoc Location... button.
-
-
In the dialog box that appears:
-
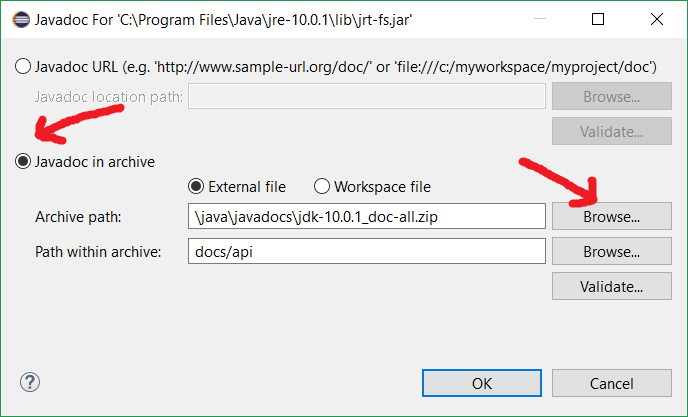
Check ON the Javadoc in archive button.
-
Hit the Browse... button next to the Archive Path text box, locate the Javadocs zip file you downloaded earlier, then hit Open.
-
In the Path within archive text box, docs/api.
-
Hit OK, then hit Finish.
-
-
Hit the Apply and Close button to save your changes.
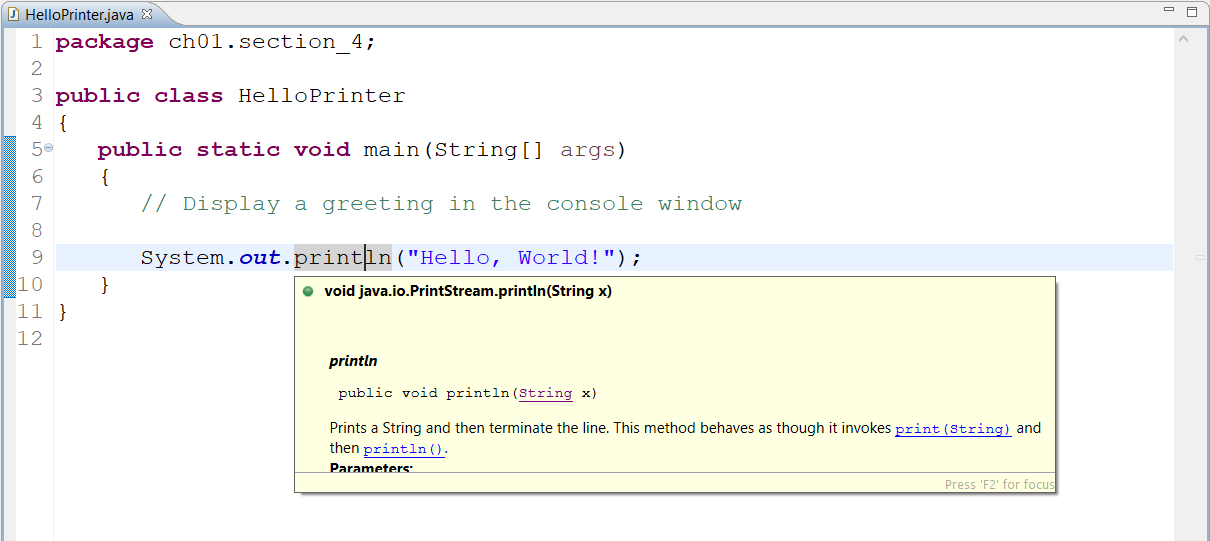
Move your mouse cursor and hover over a built-in class, method, or field name. Eclipse now displays a pop-up window with that item's Javadoc entry.