Eclipse IDE: Install & Run
-
Find and launch the Eclipse for Java Developers installer you downloaded from the Eclipse website.
-
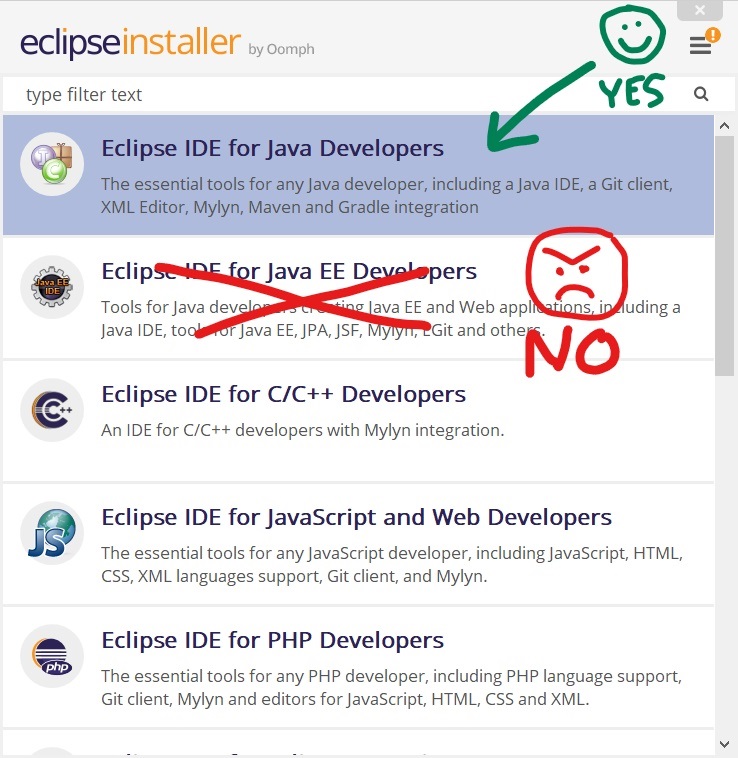
The Main Options screen appears. Choose Eclipse IDE for Java Developers:
-
The Installation Folder screen appears.
- Check that the Java 11+ VM path points to the location of your OpenJDK (Zulu) folder.
- The default install folder and options are fine, so hit the Install button to begin the installation.
-
The installer begins installing Eclipse. As the installation progresses...
- Read and accept any License Agreements.
-
When the installation completes, hit the Launch button to run Eclipse.
-
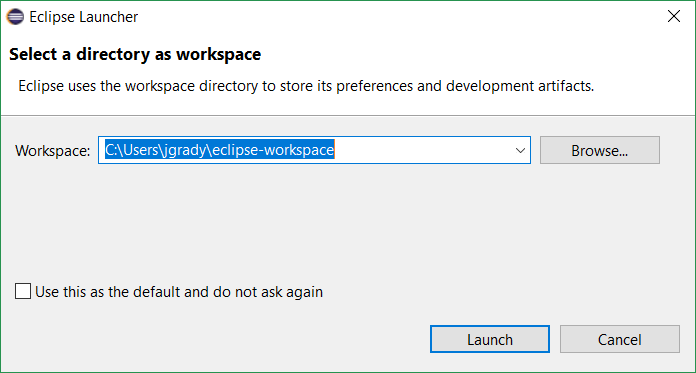
As Eclipse loads, the Select a directory as workspace box appears.
× Note: An Eclipse workspace is a folder that stores a group of related projects together.-
On Windows, the default workspace folder is "C:\Users\<your_username>\eclipse-workspace", where <your_username> is the name of your Windows login:
-
You can keep this folder, or type the workspace folder preferred by your instructor: C:\Users\<your_username>\Documents\Eclipse Projects:
-
If you are on your own machine, check the Use this as the default and don't ask again checkbox.
× Note: Your instructor strongly encourages you to keep all assignments, exercises, and labs together in the same workspace. -
Hit the Launch button to complete the startup.
-
Where to Go Next
With Eclipse installed, the next steps are to customize the Eclipse workspace and create a project. Here are some links to help you get started using the program:


